The Travelling Butterfly
Hi! Let's talk accessories, one of my favorite subjects. Unfortunately, I'm not the best fashionista, but I do like to accessorize my home:) I love creating little vignettes around the house..."small pleasing views" (dictionary.com) that your eye stumbles across as you tour a room or that you come upon as you walk down a hallway. Success can be achieved by applying the same general rules or guidelines that you would to a full room, just in a smaller version (color, scale, balance, repetition, etc).
Don't be scared to or nervous about accessorizing because:
I have a ton of accessories that would work in a bunch of my rooms (when I buy little stuff for the house I more often than not don't have a specific spot in mind for it, I just know that I like it and that I can get it to work somewhere). Plus I think I get bored easily, so I like swapping out my accessories every so often to change things up, decorate for the season, or try out a new color palette.
Case in point...the travelling butterfly. Some of you might recognize him from my recent family room post or my office post. That's because he gets around!! Since I made this little guy about a year and a half ago, he's been in 4 different spots in 3 different rooms in our house. I'd say I got my money's worth. Oh wait, I didn't really spend any money on him:) Even better.

I originally DIYed this print when I needed something more for the winter mantle I was putting up after I took down all the holiday stuff last year. I had these 2 brown wood frames lying around, and filled the smaller one with a bird print from a calendar I had. After messing around with the composition for a while, I finally had it how I liked it, but didn't have anything in the wide molding frame on the left. (I wasn't blogging then, so no in progress pics, sorry!)
 {This is my fireplace. I love my fireplace. This is also the old yellow paint color. I've sinced painted this room twice to find the right new color.}
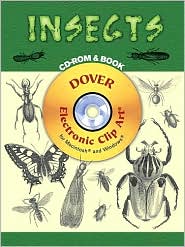
I love anything nature-related and am especially drawn to botanical illustrations and other vintage looking nature art, so I thought something along those lines would work nicely with my bird print. So I put together this little collage from a book of insect clip art I already had for my side business of designing wedding invitations.
Then I just printed it out on some nice cream paper and loaded it up into the frame:) Thus, Mr. Butterfly in Spot #1.

When last fall came, I redid the mantle in the living room with some autumn decorations that did not include the butterfly print or the bird. But I still liked them, and I realized that I needed some new stuff to go on my "fall" ledge shelves in the family room. Enter Mr. Butterfly and his sidekick Mr. Bird. Mixed with some wheat, a gourd and mini-pumpkin, they added the right height and color to this new vignette. And now the green in the butterfly goes nicely with the soft green walls in this room. Spot #2.


Eventually the family room ledge shelves got redone again, and Mr. Butterfly and Mr. Bird needed a new home. Hmm, I thought, they're in frames, why not hang them up? This little wall in between the windows in the living room had something else hanging on it, but I was tired of it. So instead, I put up the prints. (See them there? I don't have a more up close pic of this, sorry.) Spot #3.
 {This is our living room. You have not met it yet, unless you know me from thenest.com! More to come on the living room in future posts.}

There you have it...how inexpensive DIY art can go for miles. So don't be afraid to accessorize, if you don't like how it turns out, take the stuff down, move it somewhere else, or keep it for later when your taste might change again or when you might find something to pair with it for the perfect look.
Stay tuned for the sequel to this story tomorrow when we find out what happened to the brown frame Mr. Butterfly left behind!
Don't be scared to or nervous about accessorizing because:
- accessories don't have to be expensive
- they don't have to be permanent
I have a ton of accessories that would work in a bunch of my rooms (when I buy little stuff for the house I more often than not don't have a specific spot in mind for it, I just know that I like it and that I can get it to work somewhere). Plus I think I get bored easily, so I like swapping out my accessories every so often to change things up, decorate for the season, or try out a new color palette.
Case in point...the travelling butterfly. Some of you might recognize him from my recent family room post or my office post. That's because he gets around!! Since I made this little guy about a year and a half ago, he's been in 4 different spots in 3 different rooms in our house. I'd say I got my money's worth. Oh wait, I didn't really spend any money on him:) Even better.
I originally DIYed this print when I needed something more for the winter mantle I was putting up after I took down all the holiday stuff last year. I had these 2 brown wood frames lying around, and filled the smaller one with a bird print from a calendar I had. After messing around with the composition for a while, I finally had it how I liked it, but didn't have anything in the wide molding frame on the left. (I wasn't blogging then, so no in progress pics, sorry!)
{This is my fireplace. I love my fireplace. This is also the old yellow paint color. I've sinced painted this room twice to find the right new color.}I love anything nature-related and am especially drawn to botanical illustrations and other vintage looking nature art, so I thought something along those lines would work nicely with my bird print. So I put together this little collage from a book of insect clip art I already had for my side business of designing wedding invitations.
Then I just printed it out on some nice cream paper and loaded it up into the frame:) Thus, Mr. Butterfly in Spot #1.
When last fall came, I redid the mantle in the living room with some autumn decorations that did not include the butterfly print or the bird. But I still liked them, and I realized that I needed some new stuff to go on my "fall" ledge shelves in the family room. Enter Mr. Butterfly and his sidekick Mr. Bird. Mixed with some wheat, a gourd and mini-pumpkin, they added the right height and color to this new vignette. And now the green in the butterfly goes nicely with the soft green walls in this room. Spot #2.
Eventually the family room ledge shelves got redone again, and Mr. Butterfly and Mr. Bird needed a new home. Hmm, I thought, they're in frames, why not hang them up? This little wall in between the windows in the living room had something else hanging on it, but I was tired of it. So instead, I put up the prints. (See them there? I don't have a more up close pic of this, sorry.) Spot #3.
{This is our living room. You have not met it yet, unless you know me from thenest.com! More to come on the living room in future posts.}Finally, the time had come for Mr. Butterfly and his friend Mr. Bird to split up. Not really, but I needed some art for up in the office and I had already taken him out of his brown frame to put something else in there. I thought he might be a fun pop of color against the pale blue walls, and its helps to have nice things to look at while you're working. This time I put him in black frame (that I had lying around), and because it had a smaller opening, his other buddies got a little cropped out. No problem, they're still doing better than Mr. Bird, who is currently sitting inside our entertainment center (with some other decor stuff I'm not using) waiting for his chance to shine again. Here's Mr. Butterfly in his 4th and current spot. Who knows where he'll end up next?!
There you have it...how inexpensive DIY art can go for miles. So don't be afraid to accessorize, if you don't like how it turns out, take the stuff down, move it somewhere else, or keep it for later when your taste might change again or when you might find something to pair with it for the perfect look.
Stay tuned for the sequel to this story tomorrow when we find out what happened to the brown frame Mr. Butterfly left behind!


Wow -- Love. Your. Living space.
ReplyDeleteGreat idea to use your nature botanical printouts as art in your home. I LOVE that idea, and it's practical, too -- EVERYONE has a frame they can repurpose into new art. I also like to get art from istockphoto. It's a great site to find those pictures you need!
Sarah, you artwork and mantel look great!
ReplyDeleteA gal after my own heart. My husband won't share my approval as I have traveling decor. When we met, before we married 9 yrs. ago, he'd probably not changed a thing in his home for 12 yrs. or more.
ReplyDeleteI've always loved your vignettes!
ReplyDeleteI'm coming back tomorrow to see where Mr. Butterfly's old flame, I mean frame relocated...it's like a drama, the suspense is killing me! lol
Beautiful. Repurposing is my fist love! It's so much better to keep mixing things up!!
ReplyDeleteI love your little vignettes! They're great inspiration for me - I don't want to get too nick nack-y, so yours are just perfect.
ReplyDelete